Expert Guide: How to Hand Stamp Metal for Stunning Results
- USQuickBlogs
- 22 Jan, 2025
Expert Guide: How to Hand Stamp Metal for Stunning Results
Want to know how to hand stamp metal for unique, personalized creations? This guide covers essential tools, setting up your workspace, mastering basic techniques, and avoiding common mistakes. Start your journey to making beautiful, custom pieces today.
Key Takeaways
Tools like a heavy stamping hammer and a stable bench block are crucial for clear and professional metal stamping results.
Proper alignment and consistent striking technique are key to achieving crisp impressions; practice on scrap pieces to get the hang of it.
Starting with simple projects, like name pendants or date tags, helps beginners build confidence and hand stamping skills.
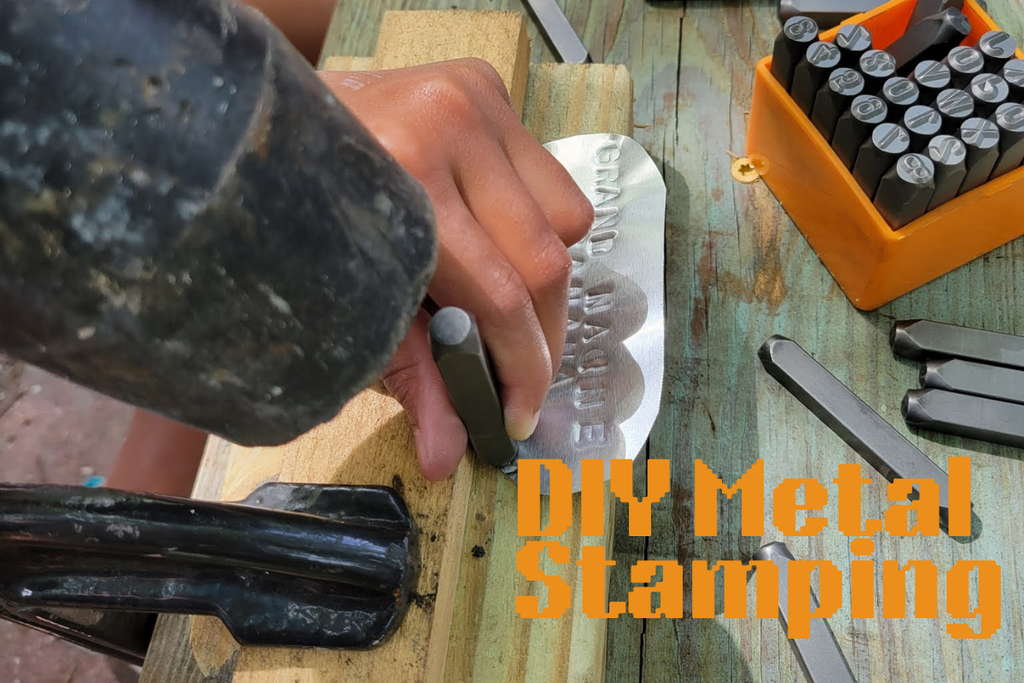
Essential Tools for Hand Stamping

Stunning metal stamping results require the right tools. The essential tools for hand stamping include metal stamps, a stamping block, a stamping hammer, stamping tape, and a polishing cloth. Each tool ensures your designs are clear and professional.
A heavy stamping hammer is recommended for the best results. The hammer's weight helps create a clear impression on the metal blank. A steel bench block provides a solid surface, supporting the stamp and metal, ensuring crisp and clear designs.
A polishing cloth is useful for cleaning blanks before and after stamping and preparing them for jewelry. The right tools will set you on the path to creating beautiful, hand-stamped pieces.
Setting Up Your Workspace
An ideal workspace is just as important as having the right tools. A steel bench block is crucial for providing a solid, sturdy surface supporting the stamp and metal. A solid and stable base minimizes the chances of misalignment or uneven strikes.
Reduce noise and vibration by placing a leather sandbag under your steel bench block. This protects your work surface and makes the stamping process more comfortable. A sturdy MDF or hardboard under the block offers better impact absorption.
Place your stamping block on a sturdy table leg to effectively distribute force during stamping. A hard, flat table or bench provides a stable stamping surface. These tips will optimize your workspace for creating beautiful hand-stamped pieces.
Mastering the Technique
Hand stamping requires practice and patience to master. Practice on scrap pieces or practice blanks before working on your final piece. This helps you determine the correct pressure and placement for the hand stamp.
Consistent practice teaches you the correct pressure and placement, significantly influencing your results. Technique and thorough practice affect metal stamping success.
Beginners should expect early projects to fall short but will improve with practice.
Aligning Your Metal Stamps
Proper alignment is crucial for professional results in metal stamping. Stamping tape helps align text or numbers accurately on the metal. Use masking tape to secure the metal blank and prevent movement during stamping.
Mark the center of your blank and plan outward for accurate placement. A pencil and masking tape can mark stamping points, aiding in positioning and even spacing. Planning and marking the center enhances placement accuracy.
A stamp guide aids in evenly spacing letters and aligning impressions accurately. Ensure stamps are held straight and perpendicular to avoid crooked letters. These tips help achieve precise and professional results.
Striking the Metal
Correctly striking the metal is crucial for clear impressions. Metals like aluminum and brass require different levels of strength for clear impressions. Softer metals like aluminum need less force, while harder metals like brass require a stronger hit.
Balancing force is crucial as it affects the clarity of the impression. Inconsistent striking force causes uneven impressions, which can be corrected by adjusting the technique. Over-striking with excessive force can lead to blurred or distorted impressions.
Ensure consistent pressure to fix uneven impressions. Practice on scrap pieces to learn the force needed for different metals. The right balance and practice will yield clear and consistent impressions.
Choosing the Right Blanks

Selecting the proper blanks is key for successful metal stamping. Metal blanks come in materials like aluminum, brass, copper, and sterling silver, each with distinct characteristics. Aluminum is softer and easier for beginners, while brass and copper require more force but offer a beautiful finish.
Beginners should use larger tags or practice blanks to ease the learning process. Practice stamping with copper or aluminum to avoid wasting expensive materials. Different alloys require different techniques, so understanding your material is crucial for the best results.
Experiment with various materials to find what works best for your projects. The proper stamping blank lets you create stunning, hand-stamped pieces showcasing your creativity and skill.
Adding Finishing Touches
Finishing touches can elevate your stamped pieces from good to great. Use a polishing cloth to clean off marks after stamping metal. This ensures your finished pieces look professional and polished.
Blank enamel can enhance the appearance of stamped jewelry. Patina applied with a fine brush improves the contrast and visibility of stamped letters. These finishing touches enhance aesthetics and ensure durability.
Darkening Letters
Darkening letters on stamped pieces make them more visible and striking. Enhance the visibility of stamped letters with a black Sharpie or blank enamel. This simple step significantly enhances the overall look of your pieces.
Use a polishing cloth to fix mistakes made while darkening stamped letters. If you mark outside the lines, a quick rub with a cloth can clean it up, keeping your design sharp and professional.
Blank enamel ensures stamped details remain visible after wear. It provides a durable finish, keeping letters dark and readable for years. These tips ensure your stamping blank enamel pieces look stunning and last long.
Creating Holes
Creating holes in metal tags allows them to be attached to various items. Specialized hole-punching tools allow for precise hole placements in metal tags. These tools ensure holes are accurately placed while maintaining the integrity of the metal tag.
Adding holes is straightforward and quick with the right tools. Plan hole placement before punching to avoid mistakes. Precise hole-punching tools prepare your metal tags for any project.
Texturing the Surface
Texturing metal surfaces adds a unique and personal touch. Unique textures on metal surfaces significantly enhance visual appeal. Ornamental stamps add unique textures, enhancing the metal’s visual appeal.
Patina or enamel enhances contrast by darkening recessed areas of imprinted designs. This adds depth, making your designs stand out. Texturing metal adds aesthetic value and creates a tactile experience.
Experiment with various textures and finishes to find the best for your projects. These techniques help you create one-of-a-kind pieces reflecting your creativity and style.
Advanced Techniques for Unique Designs
After mastering the basics, explore advanced techniques for unique designs. Dapping enhances the visual appeal of stamped pieces without altering the original design. It involves shaping the metal into a dome or curve, adding dimension.
Combining various fonts adds a personalized touch to metal stamping projects. Experiment with different shapes and designs to create intricate pieces. Advanced techniques push the boundaries of your creativity, creating genuinely personalized gifts and jewelry.
The right tools and practice can elevate your metal stamping projects. Advanced techniques add depth, dimension, and personalization to your stamped stamp, including metal stamping supplies and jewelry stamping.
Starting Simple Projects
Starting with simple projects helps build confidence and skills for beginners. Name pendants are ideal for personal expression. Create personalized jewelry with names, dates, or special messages.
Date tags commemorate special occasions like anniversaries or birthdays. Pet tags combine functionality with a personal touch. These simple yet rewarding projects are perfect for beginners.
Flat metal tags are easier for beginners to work with. Start small and simple; practice on practice blanks or larger tags to hone your skills. You’ll soon create beautiful, hand-stamped pieces with practice and the right tools.
Troubleshooting Common Issues
Common mistakes can occur even with practice. Proper die maintenance and calibration prevent defects like misalignment. Regular inspection of tools and dies minimizes over-striking, which can damage impressions.
If your impressions are uneven, it could be due to inconsistent striking force. Practice on scrap pieces to learn the force needed for different metals. Adjusting your technique and ensuring consistent pressure can help achieve clear and consistent impressions.
Don’t feel discouraged if your first attempts aren’t perfect. Troubleshooting common issues is part of the learning process. You’ll improve and create stunning, hand-stamped pieces with practice and patience.
Summary
In summary, hand-stamping metal is a rewarding and creative craft that allows you to make personalized jewelry and gifts. Each step is crucial for achieving professional results, from selecting the right tools and setting up your workspace to mastering the technique and adding the finishing touches.
Remember, practice makes perfect. Don’t be discouraged by initial mistakes; improvement comes with time and experience. With the knowledge and tips in this guide, you’re well-equipped to start your journey into metal stamping. Happy stamping!
Frequently Asked Questions:
What tools do I need to start metal stamping?
To get started with metal stamping, you'll need metal stamps, a sturdy stamping block, a stamping hammer, some stamping tape, and a polishing cloth. Once you have these, you're all set to create fabulous designs!
How do I create a stable workspace for metal stamping?
To create a stable workspace for metal stamping, use a steel bench block on a solid surface and throw in a leather sandbag to help with noise and vibrations. Trust me, it makes a big difference!
How do I ensure my stamped letters are aligned?
To ensure your stamped letters are aligned, use stamping tape to mark your points and consider a stamp guide for better spacing. It'll make your designs look way more professional!
How do I make my stamped letters more visible?
Darkening your stamped letters with a black Sharpie is a quick fix to make them pop. Just grab a polishing cloth to clean up any smudges afterward!
What are some simple projects for beginners?
Name pendants, date tags, and pet tags are awesome beginner projects. They let you practice with flat metal tags while building your skills—a perfect way to start!