The Ultimate Guide to DIY Metal Stamping: Tools and Techniques for Beginners
- USQuickBlogs
- 12 Aug, 2025
Ultimate Guide to DIY Metal Stamping
Want to craft custom metal designs at home? DIY metal stamping is a rewarding way to create unique pieces using basic tools. This guide covers everything you need to get started, from selecting the right supplies to mastering essential techniques. Perfect for beginners and hobbyists alike.
Getting started in DIY metal stamping requires basic tools like hammers, stamps, and a solid work surface for best results.
Choosing the right materials and metals is key to achieving clear and professional impressions in your projects.
Advanced techniques such as layering metals, applying heat treatment, and incorporating unique finishes can elevate the quality and creativity of your stamped pieces.
Getting Started with DIY Metal Stamping
DIY metal stamping is an art form that allows you to etch designs, letters, and patterns onto metal surfaces, creating personalized and unique pieces. The appeal lies in its versatility and the satisfaction of crafting something by hand. Starting your metal stamping journey requires a few key tools, materials, and a metal stamp.
A comprehensive DIY metal stamping kit typically includes hammers, metal stamps, and polishing cloths. These tools form the backbone of your crafting arsenal. Metal stamps and rhinestones are generally made of high-quality metal and resin, ensuring reliability and durability. Beginners should start with a basic set of metal stamps, blanks, and hammers. Practicing with a variety pack of metal blanks can help you get a feel for the process and build confidence.
Choosing the appropriate surface for stamping is equally important. A towel placed over a mouse pad or a concrete floor provides the necessary stability for clear impressions. Armed with these basics, you’re set to explore the creative possibilities of metal stamping.
Selecting the Right Metal Stamping Supplies
Selecting the correct metal stamping supplies is crucial for optimal results. The type of metal you select can significantly impact your projects. Aluminum, for example, is a lightweight metal that resists corrosion, making it ideal for pieces where reducing weight is essential. Mild steel, or low carbon steel, is easy to form and weld, and is commonly used in automotive and industrial applications.
For more robust projects, high-strength low-alloy steel offers improved strength and corrosion resistance, often used in structural and automotive contexts. The choice of metal affects the clarity and quality of your stamped designs; softer metals like aluminum produce clearer impressions than harder metals like brass.
Investing in high-quality tools and supplies is vital for professional results. A purchase of reliable metal stamps and stamping dies can make a significant difference in the clarity and precision of your designs.
Preparing Your Workspace
Having a well-prepared workspace is essential for successful metal stamping. Key points include:
The force applied while hammering requires a sturdy surface to avoid any movement.
A solid surface like a steel bench block is essential for effective stamping.
This helps keep the metal blank steady, enabling precise and consistent impressions of the material.
Using masking tape to secure the metal blank in place can prevent any shifting during the stamping process. Additionally, marking the area where you plan to stamp helps maintain accuracy and alignment.
A well-organized workspace allows you to focus on crafting beautiful pieces without stability concerns.
Creating Your First Stamped Jewelry Piece
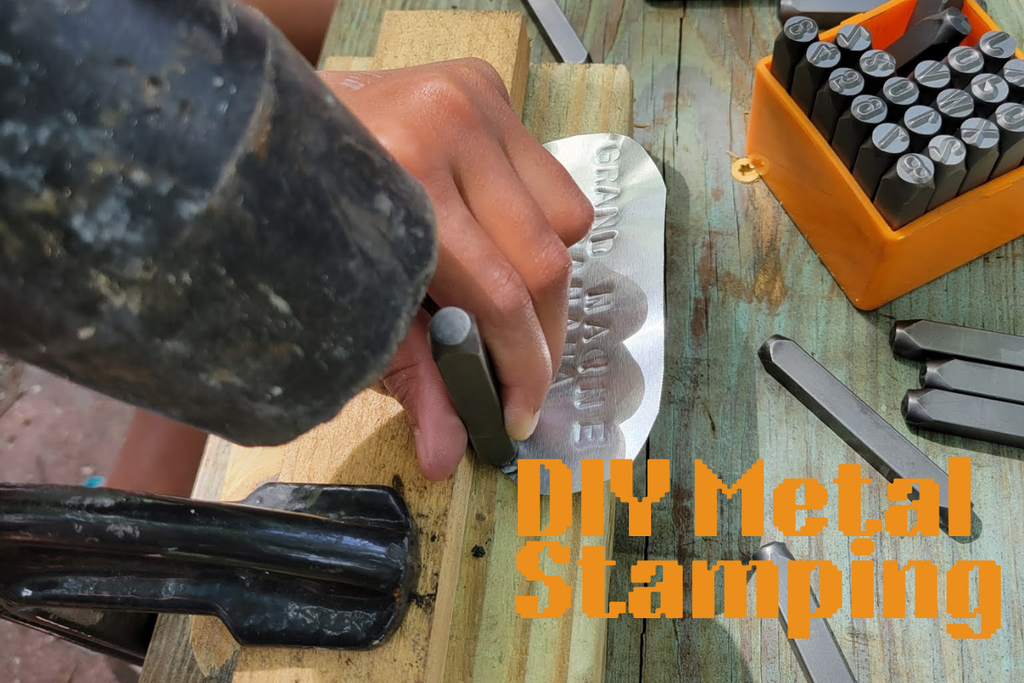
Creating your first stamped jewelry piece is an exciting milestone. Begin with simple bracelets. Begin by placing a metal strip on a solid surface. Stamping tape can secure the metal blank and prevent misalignment.
Select your alphabet stamps and position them on the metal strip. Strike each stamp with a hammer to create even impressions. Practicing on aluminum sheets or foil can help you understand the necessary impact force for stamping. Once you’ve stamped your design, shape the metal strip into a bracelet using a bending tool to achieve the desired curve.
To enhance the visibility of the stamped letters, fill them with a permanent marker and wipe away the excess ink. Starting with larger practice blanks can help beginners reduce mistakes and build confidence in their search. Use a tag to organize your materials effectively and keep your lines neat to hit the desired outcome. If you forgot to clean the stamps, it may affect the results with your fingers. Watch your progress as you improve your technique.
With these steps, you’ve created your first beautiful piece of stamped jewelry!
Techniques for Perfect Impressions
Achieving perfect impressions in metal stamping requires a combination of technique and practice. Adjusting the amount of force when hammering is essential, as different metals require varying levels of impact to achieve clear impressions. Using a heavy stamping hammer can help deliver sufficient force onto the metal, ensuring clear and consistent impressions.
Practicing on scrap metal before working on your final piece allows you to find the right pressure and placement, ensuring better results. Here are some tips for achieving professional results:
Align stamps accurately.
Use masking tape to secure metal blanks and prevent movement during stamping.
Use a stamp guide to maintain even spacing and proper alignment of letters during the stamping process.
Advanced techniques like using stamping dies can enhance precision and detail in your designs, making it easier to create complex patterns. Varying the depth and pressure during stamping can create 3D effects, adding a unique dimension to your pieces. With these techniques, you’ll be well on your way to mastering the art of metal stamping.
Heat Treatment and Annealing
Heat treatment is a vital process in metal stamping that alters the physical properties of the metal, enhancing its malleability and preventing tearing during stamping. Implementing effective heat treatment processes improves the malleability of metals, thereby enhancing the metal stamping outcomes and minimizing defects.
Collaboration between stamping engineers and heat treating suppliers is crucial for selecting the right treatment process for specific applications. Quality control during heat treatment includes monitoring hardness and conducting real-time inspections to ensure part performance meets specifications.
Incorporating heat treatment into your process leads to more consistent and high-quality results.
Advanced Stamping Techniques
As you become more comfortable with basic metal stamping, you may want to explore advanced techniques to add depth and visual interest to your designs. One way to achieve 3D effects is by layering multiple metals, which creates a sense of depth and complexity in your pieces. This technique involves stacking different metals and stamping them together to produce intricate designs.
Incorporating multiple colors into your stamping designs can also enhance their visual appeal, an idea that often involves using different inks or foils to achieve vibrant and eye-catching results.
Another advanced technique is using liver of sulphur to create unique patina effects, adding depth and character to your designs. These advanced techniques can elevate your metal stamping projects, enabling you to create unique and personalized pieces that stand out.
Troubleshooting Common Issues
Even with practice, you may encounter common issues in metal stamping. Uneven impressions are often caused by improper alignment of the stamping tools or inconsistent pressure applied during stamping. To fix this, ensure that the metal is properly secured and that the stamping die is adequately aligned before starting the process.
Metal warping can occur when excessive heat is applied during stamping, necessitating controlled temperature management to prevent distortion. Regular inspection and maintenance of your stamping tools and tooling are essential to prevent tool wear that can lead to poor quality impressions in the machine.
Addressing these common issues enhances the quality and consistency of your stamped designs.
Finishing Touches
The finishing touches can make all the difference in your stamped jewelry pieces. These include:
Polishing your stamped metal pieces enhances their shine and removes any scratches or imperfections.
Painting stamped metal to add color and personality, making your pieces more eye-catching.
Incorporating different colors often requires the use of various paints or coatings after the initial stamping.
Trying different finishing techniques can yield various effects, ensuring each piece is unique. These final steps can elevate your creations, giving them a polished look and leaving a lasting impression, whether worn or presented at checkout in a fashion setting.
Sharing Your Creations
Sharing your creations is a great way to engage with your audience and showcase your talent. Encourage your audience to share their own stories or photos wearing your jewelry, fostering a sense of community. Running contests or giveaways related to your jewelry can effectively increase engagement and visibility of your creations.
Strategies to promote your jewelry include:
Collaborating with influencers who align with your brand to reach a wider audience and boost interest.
Creating themed jewelry collections for specific occasions or seasons to attract more attention and engagement from potential buyers.
Sharing your creations to build a loyal following and inspire others with your work.
Summary
In this guide, we’ve explored the essentials of DIY metal stamping, from selecting the right tools and materials to mastering techniques for perfect impressions. You’ve learned how to create your first stamped jewelry piece, troubleshoot common issues, and add those finishing touches that make all the difference.
Now it’s time to put your new skills to the test and start creating beautiful, personalized pieces. Remember, practice makes perfect, and each project is an opportunity to learn and improve.
Frequently Asked Questions
What are the essential tools for DIY metal stamping?
For DIY metal stamping, you’ll need metal stamps, blanks, a hammer, and a steel bench block. A good kit might also have polishing cloths and stamping tape for a polished finish.
Which metals are best for beginners in metal stamping?
For beginners in metal stamping, softer metals like aluminum are perfect because they offer clearer impressions and are easier to handle. Mild steel is also a solid choice for those looking for a bit more durability.
How can I avoid uneven impressions in metal stamping?
To avoid uneven impressions in metal stamping, make sure your stamping tools are properly aligned and apply consistent pressure during the process. Using masking tape to secure the metal blank and practicing on scrap pieces can help refine your technique.
What are some advanced metal stamping techniques?
You can achieve some really cool results in metal stamping by layering metals for 3D effects, adding multiple colors with inks or foils, and using liver of sulphur to create unique patina effects. These advanced techniques can elevate your projects!
How can I share my metal stamping creations with others?
You can share your metal stamping creations by telling stories about your work, posting photos on social media, hosting contests, and collaborating with influencers to reach a broader audience. It's all about connecting with people and showcasing your unique collections!