What Tool Was Used by Engravers to Manually Carve an Image in a Metal Plate to Produce an Engraving?
- USQuickBlogs
- 31 May, 2025
The primary tool used by engravers to manually carve an image in a metal plate to produce an engraving is called a burin. Having access to the right tools and materials, such as metal blanks and a properly positioned workpiece, is fundamental for beginners and professionals alike. This sharp, angled tool, known for its precision, is what tool was used by engravers to manually carve an image in a metal plate to produce an engraving, allowing for intricate designs on metal surfaces and making it essential in traditional engraving. In this article, we’ll explore the burin’s role in engraving, its anatomy, types, and techniques.
Introduction to Engraving
Engraving is the process of carving or cutting designs, patterns, or text into a metal surface, such as silver, gold, or copper, using an engraving tool. This technique can be used to create intricate designs, personalized messages, or artwork on various materials, including metal, wood, and stone. Engraving is a popular method used in jewelry making, art, and other decorative items. With the right tools and techniques, anyone can learn to engrave metal and create unique, customized pieces. Whether you’re working on a delicate piece of jewelry or a detailed wood engraving, the process requires precision and creativity. The versatility of engraving makes it a cherished art form, allowing for the creation of both functional and decorative items.
Key Takeaways
The burin is the essential tool for manual engraving, allowing engravers to create intricate and precise designs on metal surfaces.
Understanding the anatomy and types of burins enhances engraving skills, with different shapes suited for various design intricacies.
Despite modern engraving technologies offering higher precision and efficiency, traditional methods like using a burin provide unique artistic value and personal touch.
Having access to the right tools and materials, such as metal blanks and positioning aids, is crucial for successful engraving, especially for beginners.
History of Engraving
The history of engraving dates back to ancient civilizations, where it was used to create decorative items, such as jewelry, coins, and other metalwork. Over time, engraving techniques have evolved, and new tools and methods have been developed. Today, engraving is used in various industries, including jewelry making, art, and manufacturing. The development of new technologies, such as laser engraving, has made it possible to engrave complex designs and patterns with high precision and accuracy. Engraving has become a popular hobby and profession, with many artists and craftspeople specializing in this technique. From the intricate designs of ancient artifacts to the precise engravings produced by modern laser technology, the art of engraving continues to captivate and inspire.
The Traditional Burin: The Essential Engraving Tool
The burin, also known as a graver, is the cornerstone of manual engraving. This engraving tool’s sharp, angled tip allows engravers to carve intricate designs into metal surfaces with remarkable precision. The burin is not merely a tool but an extension of the engraver’s hand, capable of bringing detailed images to life on metal plates.
Aluminum and brass are also commonly engraved metals due to their softer nature, making them suitable for various engraving techniques.
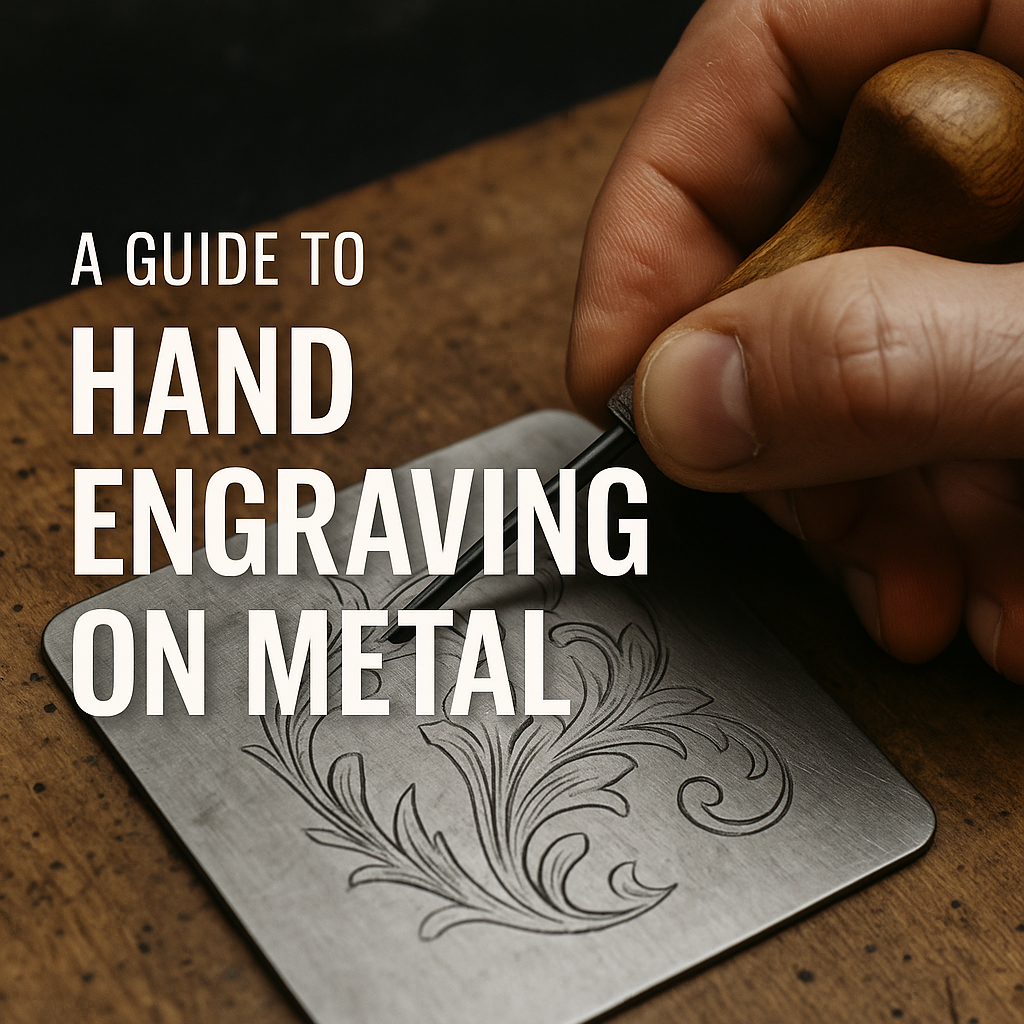
Hand engraving, especially with a burin, is an art that demands both skill and patience. The burin’s versatility is evident in its use across various forms of engraving, from silver and jewelry to artistic engravings on different metals. This essential tool can create a range of effects, making it indispensable for those who wish to engrave metal by hand.
The burin’s importance cannot be overstated. It is fundamental in achieving the intricate designs and fine details that characterize high-quality engravings. Without the burin, the traditional engraving process would lose much of its precision and artistry.
Anatomy of a Burin
Understanding the burin’s anatomy is key to appreciating its capabilities. Ergonomically designed, the handle fits comfortably in the engraver’s hand, enhancing control during the engraving process. This comfort is vital for prolonged periods of focused work.
The shaft, connecting the handle to the cutting tip, maintains stability during engraving. The cutting tip itself comes in various shapes and sharpness levels, each designed to produce different lines and intricate details. Understanding these components and their functions can greatly enhance an engraver’s ability to create precise and detailed work.
Additionally, the choice of materials like aluminum and brass can significantly affect the engraving process and the final outcome. Aluminum, being soft and affordable, is ideal for beginners to practice on, while brass, also a softer material, is excellent for detailed and artistic engravings.
Types of Burins
Different engraving projects require different types of burins. Square burins, for example, create V-shaped lines that are equal in depth and width, making them suitable for a variety of designs. These burins are available in sizes ranging from 2 to 12, allowing for flexibility in line thickness and detail.
Lozenge-shaped burins, on the other hand, produce V-shaped lines that are deeper than they are wide, which is ideal for more intricate designs. Choosing the right type of burin is essential for achieving the desired effect in any engraving project. The intricacy of the design often dictates the type of burin needed, ensuring that the final piece meets the artist’s vision. A v shaped graver can also be a valuable tool in this process. Different types of burins can also be used to engrave wood, showcasing their versatility.
Using a Burin: Techniques and Tips
Mastering the use of a burin involves understanding the proper grip and technique. Precision in engraving requires a secure grip. The angle at which the burin is held should be adjusted according to the depth of the incision required, allowing for varied textures and line thicknesses.
Engraving with a burin requires smooth, consistent motions to achieve effective results. Maintaining a steady hand is vital for producing fine detail and avoiding unwanted marks on the metal surface. Varying the even pressure applied can create different line thicknesses, adding depth and texture to the design.
Applying ink to the engraved lines is crucial for producing high-quality prints. The ink must be carefully applied and retained in the engraved lines to ensure the final print captures all the intricate details of the design.
Beginners should focus on regular practice sessions to improve control and precision, significantly enhancing their engraving skills. Over time, these techniques will become second nature, allowing the engraver to focus more on the artistic aspects of their work.
Supporting Tools for Manual Engraving
While the burin is the primary tool for engraving, several supporting tools are necessary to enhance the process. A ball vise, for example, is crucial for securing the workpiece at various angles, allowing for better control and precision. This becomes especially important for intricate designs that require constant repositioning.
Magnifying glass is another indispensable tool, providing a closer view of the intricate details being engraved. Sharpening stones maintain the cutting edge of engraving tools, ensuring the burin remains effective throughout the process. These supporting tools collectively contribute to the engraver’s ability to produce high-quality, detailed work.
Having access to the right tools and materials, such as metal blanks and proper positioning aids, is fundamental for successful engraving.
Preparing the Metal Plate
Before any engraving can begin, the copper plate must be properly prepared. This involves several steps, starting with degreasing the metal plate to ensure even adhesion of the ground during the engraving process. A mixture of whiting powder and vinegar is often used to clean the plate and prepare it for engraving.
Polishing the metal plate is another crucial step. This involves using fine steel wool to eliminate scratches and imperfections, followed by rinsing the plate with warm water to remove any residual oils or particles. Once polished, the plate is ready for engraving, with a smooth surface that allows for precise and detailed work.
Using the right paper is also essential for transferring designs onto the metal plate, as it ensures accurate and clean image transfer.
Steps to Manually Engrave a Metal Plate
The actual process of engraving a metal plate begins with holding the burin at the correct angle and applying consistent pressure to cut into the engraving metal surface. The burin, typically equipped with a wooden handle, allows for better control and precision.
After engraving, ink is applied to the engraved lines, ensuring it is retained within the cuts. Paper is then pressed onto the inked plate to transfer the design, playing a crucial role in producing high-quality prints.
Manipulating the copper metal plate is equally important. Using a sandbag or pillow can provide better control, especially when engraving curved lines. This setup helps stabilize the plate, making it easier to focus on the intricacies of the design.
To add tone and texture, hatching techniques are employed. This involves creating closely spaced lines and markings, without cutting them too near each other, to add depth and shading to the engraved area. These steps, when combined, allow for the creation of detailed and intricate etching engravings.
Engraving Safety Precautions
When working with engraving tools and materials, it is essential to take safety precautions to avoid injuries and damage. Always wear protective gear, such as gloves, safety glasses, and a dust mask, when working with power tools or handling sharp objects. Keep loose clothing and long hair tied back, and avoid wearing jewelry that could get caught in the tools. Make sure the work area is well-ventilated, and keep children and pets away from the workspace. Follow the manufacturer’s instructions for the engraving tool and materials, and take regular breaks to avoid fatigue. By adhering to these safety measures, you can ensure a safe and productive engraving experience.
Choosing the Right Tool for Engraving
The right tool for engraving depends on the material, design, and level of detail required. For hand engraving, a knife graver or a rotary tool with engraving bits is commonly used. For more intricate designs, a laser engraver or a micro motor with a V-shaped graver may be necessary. When choosing an engraving tool, consider the type of material, the level of detail required, and the desired outcome. It is also essential to invest in high-quality tools and materials to ensure the best results. Engraving tools can be found at jewelry stores, online marketplaces, or specialty stores. Selecting the appropriate tool will not only enhance the quality of your work but also make the engraving process more efficient and enjoyable.
Maintaining and Sharpening Your Burin
A sharp burin is essential for producing clean lines and detailed work. Using an Arkansas stone with oil is an effective method for sharpening the burin at a specific angle to maintain its triangular tip. Frequent sharpening during engraving ensures that the burin’s edges remain smooth and effective.
Regularly removing any metal burrs that form during the engraving process is also crucial. This helps maintain the burin’s cutting efficiency and prevents unwanted marks on the metal surface. Keeping the burin sharp and well-maintained is key to successful engraving.
Modern Alternatives to Manual Engraving
While traditional engraving methods hold a special place in the art world, modern alternatives have revolutionized the engraving process. Techniques such as rotary engraving, CNC machines, and laser engraving offer greater precision and efficiency. CNC engraving, for instance, automates the process, allowing for consistent and highly precise results.
Laser engraving, on the other hand, can produce intricate designs on various materials, often faster than traditional methods. This technology has expanded the possibilities for detailed and permanent markings on metal surfaces. The choice of laser type can significantly impact the quality and detail of the engraving, with fiber and infrared lasers being popular options.
Despite the advantages of modern methods, they come with a high initial investment for the necessary equipment. However, the efficiency and precision they offer make them a valuable addition to the engraving industry. Aluminum is commonly used in modern engraving techniques due to its soft nature, making it suitable for both laser and hand engraving.
Comparing Traditional and Modern Engraving Methods
Traditional engraving methods, such as using a burin, rely heavily on the artist’s personal touch, adding a unique artistic value to each piece. The burin has been a crucial tool in the history of engraving, enabling artists to carve intricate designs manually. Each piece is also carved with precision, showcasing the skill of the artists. Traditional methods produce unique prints, while modern methods offer efficient printing techniques.
Modern techniques like CNC laser engraving allow for rapid production and high precision, far exceeding manual methods. These techniques can process a broader range of other materials, expanding creative possibilities beyond what traditional methods can achieve.
However, while traditional methods may lack the speed and efficiency of modern processes, they offer greater artistic freedom and a personal touch that automated techniques cannot replicate. Balancing the artistic value of traditional methods with the precision and efficiency of modern techniques can lead to completing innovative and high-quality human engravings using a popular method. The historical significance of prints in the evolution of engraving techniques cannot be overstated, as they illustrate the development and artistry involved in this craft.
Applications of Metal Engraving Today
Metal engraving is as relevant today as it has ever been, with applications ranging from personalized jewelry to industrial components. Engraved metal items serve both decorative and functional purposes, including awards and identification tags. This versatility highlights the enduring appeal of precious metals, metal engraving, and jewelry stores.
One popular trend is engraving actual photographs onto jewelry, offering a unique and personalized touch that allows for creative expression through imagery.
Common applications of metal engraving include:
-
Personalized gifts like custom jewelry and engraved trophies, which are popular for their aesthetic and sentimental value
-
Creating identification tags for pets and industrial tools, enhancing both safety and functionality
-
Engraving on durable materials like stainless steel, which extends its applications across various industries
Common Engraving Mistakes
Common engraving mistakes include applying too much pressure, which can result in uneven or damaged engravings. Using the wrong tool or technique can also lead to mistakes, such as scratches or uneven lines. To avoid mistakes, it is essential to practice and develop your skills, start with simple designs and gradually move to more complex ones, and use the right tools and materials for the job. Always inspect the engraved area before completing the project, and make adjustments as needed. With patience and practice, anyone can master the art of engraving and create beautiful, customized pieces. Remember, the key to successful engraving lies in attention to detail and a steady hand.
Summary
Understanding both traditional and modern engraving techniques is essential for anyone interested in the craft. The burin remains a fundamental tool for manual engraving, while modern methods like CNC and laser engraving offer new possibilities. By mastering these techniques and tools, engravers can create detailed, high-quality works that blend artistic value with precision and efficiency.
FAQs
What is the primary tool used for manual engraving?
The primary tool used for manual engraving is the burin or graver, designed for precise cutting and detailed work on metal surfaces. This tool enables artisans to achieve fine detail in their engravings.
How do you prepare a metal plate for engraving?
To effectively prepare a metal plate for engraving, clean it with a mixture of whiting powder and vinegar, polish with fine steel wool, and rinse with warm water to eliminate any oils or particles. This ensures a smooth surface for the engraving process.
What are some modern alternatives to manual engraving?
CNC machines, laser engraving, and rotary engraving are effective modern alternatives to manual engraving, providing enhanced precision and efficiency. These technologies cater to a variety of engraving needs, streamlining the process significantly.
How do you maintain and sharpen a burin?
To effectively maintain and sharpen a burin, use an Arkansas stone with oil to maintain the sharpness of the triangular tip, and regularly remove any metal burrs produced during engraving. This approach ensures optimal performance and longevity of the tool.
What are some common applications of metal engraving today?
Metal engraving is prominently used for personalized jewelry, engraved trophies, industrial components, and identification tags for pets and tools. These applications highlight its versatility and importance in various industries.
Similarly, wood engravings have historical significance, with notable wood engravers like Gustave Doré creating detailed illustrations for publications before modern printing technologies evolved.