How To Stamp Letters On Metal Tags
- USQuickBlogs
- 20 Jul, 2023
Letter stamping on metal tags is a popular and essential technique used for various purposes. Whether for identification, personalization, or decorative purposes, letter stamping allows you to create durable and lasting impressions on metal surfaces.
Metal tags with stamped letters are commonly used in industries such as manufacturing, aerospace, and jewelry-making, where clear and permanent markings are crucial for traceability and branding. By mastering the art of letter stamping, you can add a touch of professionalism, uniqueness, and personalization to your metal tags, making them stand out and serve their intended purpose effectively.
The Stamping Process

Materials needed:
To engage in letter stamping on metal, you will need the following materials:
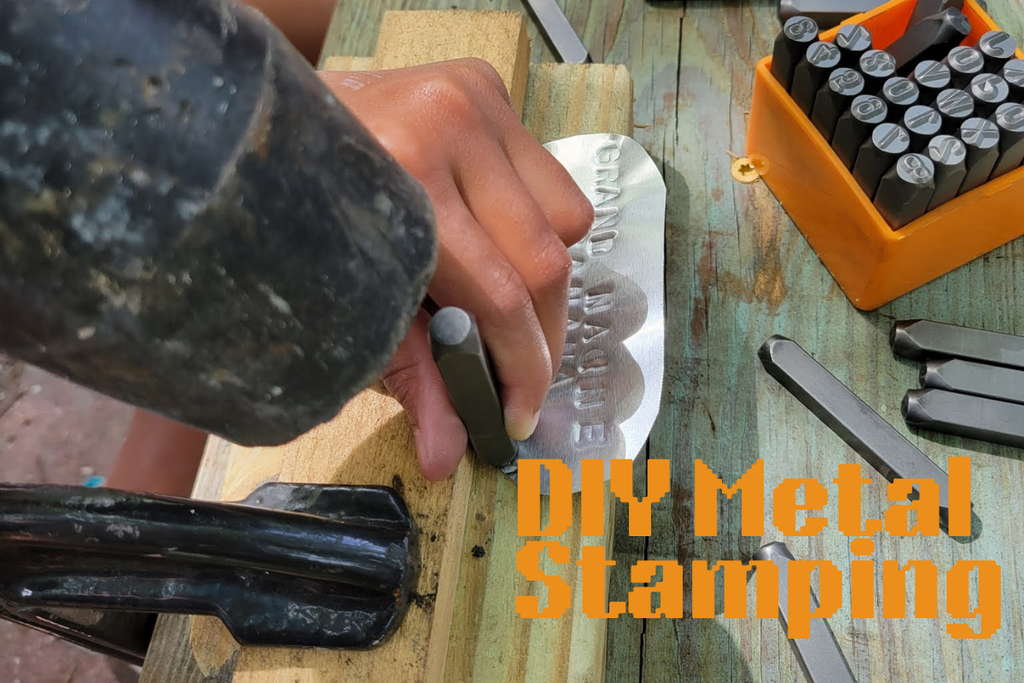
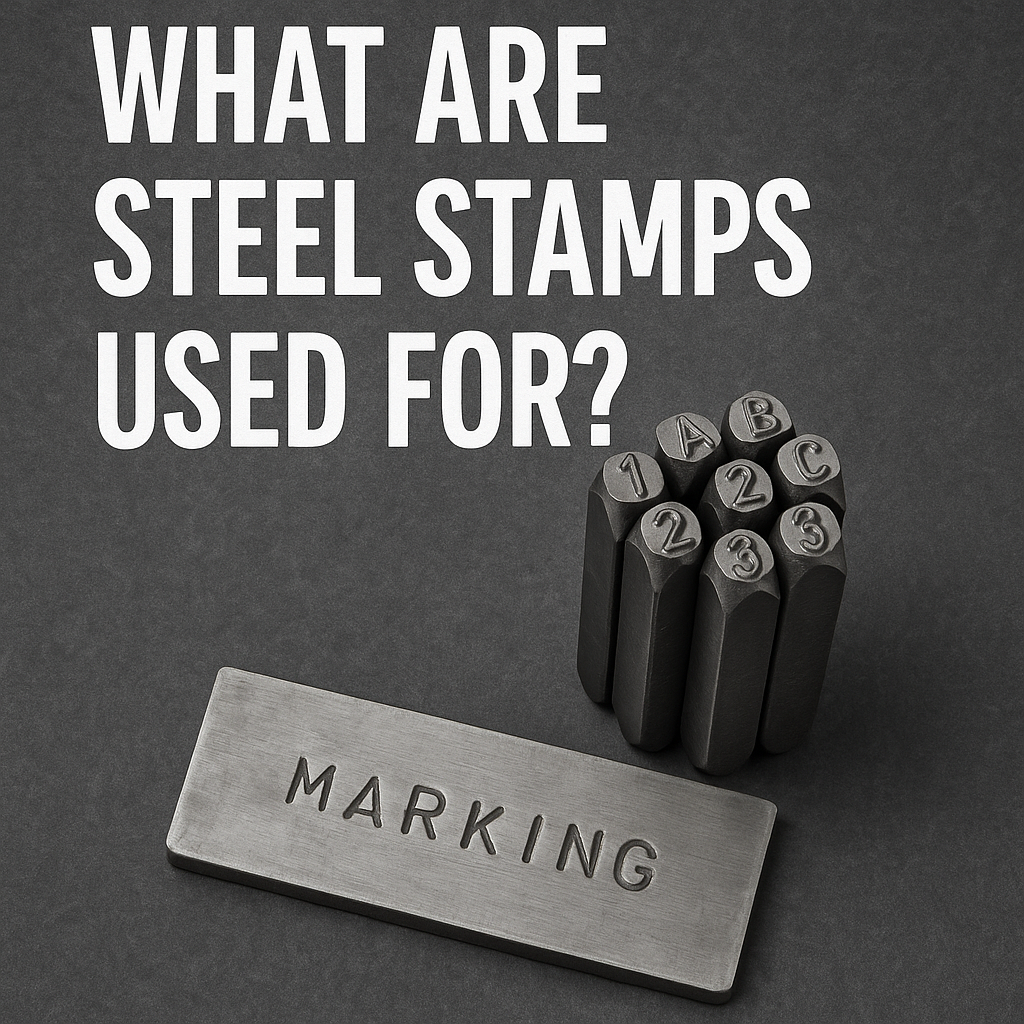
- Letter Stamps: These are metal tools with engraved letters, numbers, or symbols on the ends. They come in various sizes and fonts, allowing you to create different styles and designs. Letter stamps are essential for imprinting the desired characters onto the metal surface.
- Metal Blanks: Metal blanks refer to flat pieces of metal, usually made of materials like aluminum, brass, copper, or stainless steel. These blanks serve as the canvas for your letter stamping. They come in different shapes and sizes, depending on your project requirements.
- Hammer or Mallet: A hammer or mallet is used to strike the letter stamps and transfer the impressions onto the metal surface. It provides the necessary force to create clear and legible imprints. Choose a hammer or mallet that is appropriate for the size of your letter stamps and the hardness of the metal.
- Bench Block or Anvil: A bench block or anvil is a solid metal surface on which you place the metal blank while stamping. It provides stability and support, ensuring accurate and controlled strikes with letter stamps. A bench block or anvil should be made of a hard material to withstand the impact of the hammer.
- Stamping Pad or Mat: A stamping pad or mat is a softer surface placed underneath the metal blank to absorb some of the impacts from the strikes. It helps reduce noise and vibration and can prevent the metal from moving during stamping. A rubber or silicone pad is commonly used for this purpose.
- Optional: Marking Guidelines, Tape, and Ruler: These tools are useful for marking guidelines on the metal surface before stamping. They help ensure straight and aligned letters by providing a reference for letter placement and spacing.
Preparing the Work Area

Maintaining a clean and organized work area is crucial when it comes to letter stamping on metal. Here are some reasons why it is important:
- Accuracy and Precision: A clutter-free work area allows you to focus better and work with greater precision. It enables you to position the metal blank, align the letter stamps, and strike them accurately. With clear visibility and unobstructed movement, you can achieve clean and well-defined impressions.
- Safety: An organized work area promotes safety during the letter stamping process. By keeping tools, materials, and equipment properly arranged, you reduce the risk of accidents, such as tripping over clutter or inadvertently striking nearby objects. It also allows you to locate and access tools quickly, minimizing the chances of injury or damage.
- Efficiency and Productivity: A clean and organized work area enhances your efficiency and productivity. You can easily find the necessary tools and materials without wasting time searching for them. Additionally, an organized setup enables smooth workflow and minimizes interruptions, enabling you to complete projects more efficiently.
- Consistency and Quality: When your work area is tidy and well-maintained, it reflects your commitment to quality and attention to detail. It helps you create consistent and professional-looking letter-stamped metal tags, as you can work methodically and maintain a consistent stamping technique.
- Longevity of Tools and Equipment: A clean work area extends the lifespan of your tools and equipment. Metal shavings, dust, and debris can accumulate on surfaces and in the mechanisms of your tools, leading to premature wear and damage. Regular cleaning and proper storage prevent build-up, ensuring that your tools remain in good condition and function optimally.
- Professionalism and Presentation: An organized work area conveys professionalism and creates a positive impression. If you are working on letter-stamped metal tags for clients or customers, a clean workspace demonstrates your dedication to quality and instills confidence in your craftsmanship.
Marking Guidelines

Marking guidelines on the metal surface before letter stamping plays a crucial role in achieving precise and well-aligned letter imprints. These guidelines serve as visual references that help ensure consistent spacing, alignment, and straightness of the stamped letters. By providing a clear framework, they guide you in placing each letter stamp accurately and maintaining a uniform appearance across the metal tag.
Without marking guidelines, it becomes challenging to achieve the desired arrangement of letters, especially when working with longer words or phrases. The guidelines help you position the stamps at the correct intervals, preventing uneven spacing or crowding of characters. This attention to spacing and alignment contributes to the overall legibility and aesthetic appeal of the finished product.
Additionally, marking guidelines aid in maintaining straight and level letter impressions. They help you align the stamps parallel to the edges of the metal tag or in a specific orientation, ensuring that the stamped letters are neatly positioned. Straight and aligned letters enhance the professionalism and visual impact of the stamped metal tag, making it easier to read and understand the information or message conveyed.
Letter Stamping Technique

Maintaining the correct posture and grip when holding letter stamps is essential for achieving accurate and controlled strikes. Here's a guide to the correct posture and grip for holding letter stamps:
Posture:
- Sit or stand in a comfortable and stable position, ensuring proper body alignment.
- Keep your back straight and shoulders relaxed to promote good posture throughout the stamping process.
- Position yourself in a way that provides clear visibility and easy access to the metal blank and stamping area.
Grip:
- Hold the letter stamp with a firm yet relaxed grip. Avoid gripping it too tightly, as it may cause strain or restrict your movement.
- Position your thumb on one side of the stamp and your index and middle fingers on the other side for stability and control.
- Ensure that the letter stamp is securely held to prevent slippage during the striking process.
Alignment:
- Align the letter stamp perpendicular to the metal surface before striking. This helps ensure that the letter impression is clean and legible.
- Maintain a consistent and steady hand position as you lower the stamp onto the metal surface.
- Avoid excessive movement or wobbling of the stamp while in contact with the metal.
Striking Technique:
- Hold the hammer or mallet with a comfortable and controlled grip. Position your hand slightly above the head of the hammer for optimal leverage.
- Position the hammer perpendicular to the letter stamp, aligning it with the center of the stamp's face.
- Use a controlled downward motion to strike the letter stamp firmly and evenly. Aim for a consistent level of force with each strike to achieve uniform impressions.
Remember to take breaks if needed to avoid strain or fatigue during extended stamping sessions. Practicing and refining your grip and striking technique will help you develop better control over the letter stamps, resulting in precise and professional-looking letter imprints on the metal surface.
Stamping Practice and Letter Arrangement
Stamping Practice:
Engaging in regular stamping practice is essential for honing your skills and gaining proficiency in letter stamping. Dedicate specific practice sessions to work on your technique, experimenting with different letter stamps, fonts, and metal blanks. Starting with practice blanks allows you to focus on mastering letter placement, alignment and achieving consistent impressions. Practice helps you develop muscle memory and control over the stamping process, leading to more accurate and polished results. As you progress, challenge yourself with more complex projects to further refine your stamping skills.
Letter Arrangement:
Arranging letters evenly and symmetrically adds to the overall aesthetic and readability of your letter-stamped metal. Consider the following tips for achieving a well-balanced arrangement:
- Plan the layout: Before stamping, sketch or visualize the desired arrangement of letters. Determine the order and spacing of the words or phrases on your metal blank.
- Measure and mark: Use a ruler or template to measure and mark the positions of each letter. This ensures consistent spacing and alignment.
- Start from the center: Begin stamping from the center of the metal blank and work your way outward. This approach helps maintain symmetry and balance in the letter arrangement.
- Step back and evaluate: Periodically step back and assess your progress. Check for even spacing, alignment, and symmetry. Make adjustments as needed to maintain a visually pleasing arrangement.
Iteration and Improvement:
Remember that letter stamping, like any skill, requires practice and continuous improvement. Don't be discouraged by initial imperfections or unevenness in your letter arrangements. Keep practicing, seeking feedback, and learning from your mistakes. Each project presents an opportunity for growth and refinement. With time and experience, you will develop a keen eye for letter arrangement and consistently achieve beautifully balanced and professional-looking stamped metal pieces.
Deepening the Impressions

Deepening the impressions of letter stamps on metal adds visual impact and legibility to your stamped designs. Once you have completed the initial stamping, you can further enhance the depth of the impressions through various techniques. One method is re-stamping, which involves aligning the letter stamps with the existing impressions and striking them again with controlled force.
Another option is using a chasing hammer, which allows you to gently tap the metal around the stamped area, causing the impressions to sink deeper. However, it's important to exercise caution and avoid over-stamping, as excessive force can deform or damage the metal. By carefully and selectively deepening the letter impressions, you can create more pronounced and professional-looking stamped metal pieces.
Finishing Touches

After stamping letters on metal, it's important to clean the stamped surface to enhance its appearance and remove any residue or tarnish.
Here are some suggestions for cleaning stamped metal:
- Polishing: Use a soft polishing cloth or a jewelry polishing cloth to gently rub the stamped metal surface. This helps remove smudges, fingerprints, and light surface marks, resulting in a brighter and shinier finish.
- Mild Soap and Water: For more stubborn dirt or grime, you can wash the stamped metal with mild soap and warm water. Use a soft brush or cloth to gently scrub the surface, paying attention to the stamped areas. Rinse thoroughly and pat dry with a clean cloth.
- Metal Cleaning Solutions: There are specialized metal cleaning solutions available that are designed to clean and restore various types of metals. Follow the manufacturer's instructions for the specific cleaning solution you choose and ensure it is suitable for the type of metal you are working with.
- Sanding or Emery Boards: If there are any rough edges or sharp corners on the stamped metal, you can carefully sand them using fine-grit sandpaper or emery boards. Be gentle and work in one direction to avoid scratching the metal surface. This helps create a smoother and more refined finish.
- Patina or Oxidation Removal: If you intentionally applied a patina or if the metal has oxidized, you may want to remove or lighten it. Specific metal patina removers or oxidization removal products can be used, following the instructions provided. Remember to exercise caution and protect yourself by wearing gloves and working in a well-ventilated area.
- Protective Coating: After cleaning, consider applying a protective coating to the stamped metal surface. This can help prevent tarnishing and maintain the appearance of the metal over time. There are various protective coatings available, such as clear lacquer or specialized metal sealants. Follow the instructions and ensure the coating is compatible with the type of metal you are working with.
Always refer to the specific recommendations and guidelines for cleaning the type of metal you are working with, as different metals may require specific cleaning methods or precautions.
Troubleshooting and Tips
During letter stamping on metal, several common issues can arise, affecting the quality and appearance of the stamped letters. Understanding these issues and knowing how to address them can greatly improve the overall outcome of your projects.
One common issue is crooked or misaligned letters. This can occur if the letter stamps are not held and struck in a straight and steady manner. It's important to maintain proper posture and grip, ensuring that the letter stamps are held perpendicular to the metal surface. Take your time and double-check the alignment before striking each letter. If you notice a misalignment, carefully reposition the stamp and strike again to correct it.
Uneven impressions are another issue that can arise. This can happen if the force applied during stamping is inconsistent or if the metal surface is not flat. It's crucial to strike the letter stamps with a controlled and even force. Ensure that the metal blank is placed on a stable surface, such as a bench block or anvil, to provide support and minimize any movement. If you encounter uneven impressions, you can try re-stamping the letters with consistent force, focusing on the areas that require deeper impressions. Also, using a chasing hammer to gently tap around the stamped area can help even out the impressions.
Inconsistent letter depth is another issue that can affect the overall appearance of your stamped metal. This can occur if the pressure applied during stamping varies or if different letter stamps are used with varying forces. It's important to maintain a consistent striking technique throughout the stamping process. Be mindful of the force applied with each strike and ensure that all letter stamps are used with similar pressure. Practice and familiarity with your tools will help you develop a consistent technique, resulting in uniform letter depth.
By being aware of these common issues and employing the appropriate techniques to address them, you can significantly improve the quality and consistency of your letter-stamped metal projects. Practice, patience, and attention to detail are crucial in overcoming these challenges and achieving professional-looking results.
Visit US Quick Tags now!